
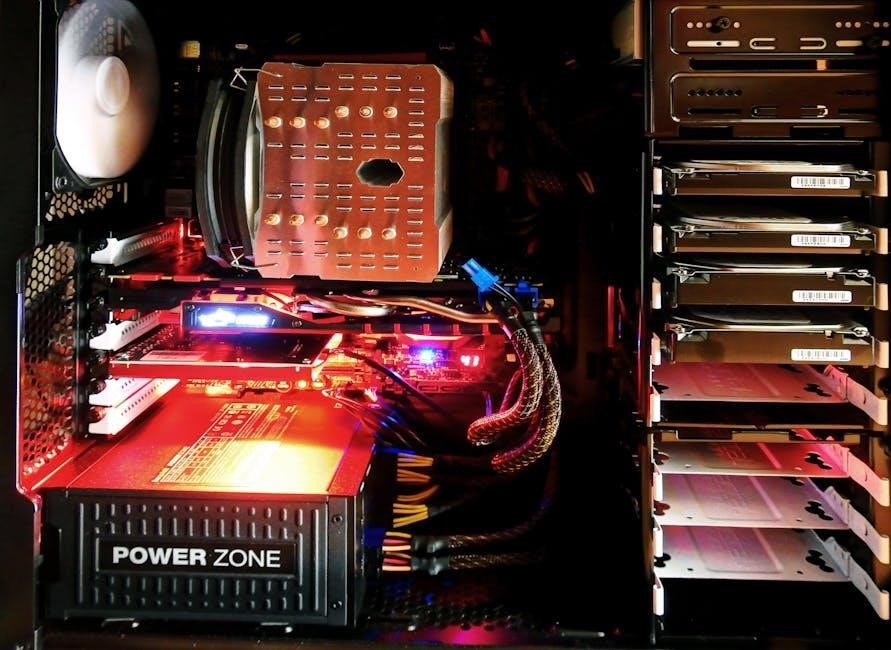
LS swap wiring is a critical step in modern engine conversions, requiring careful planning and execution․ It involves integrating advanced engine technology with your vehicle’s chassis systems, ensuring compatibility and reliability․ Proper wiring ensures smooth communication between components, such as the ECU, sensors, and accessories, while addressing power distribution, grounding, and safety․ This guide provides a comprehensive approach to tackle the complexities of LS swap wiring, helping you achieve a seamless and functional installation․
Understanding the Basics of LS Engine Swaps
LS engine swaps involve replacing a vehicle’s original engine with a General Motors LS-series engine․ These swaps are popular due to the LS engine’s lightweight design, abundant horsepower potential, and widespread availability of aftermarket parts․ The process requires careful planning, as it involves integrating the new engine’s electrical and mechanical systems with the vehicle’s chassis․ Key considerations include compatibility with the transmission, cooling system, and wiring harness․ Many enthusiasts opt for LS swaps to achieve modern performance in classic vehicles, making it a cost-effective and powerful upgrade․ Understanding these fundamentals is essential for a successful swap․
Why Wiring is Critical in LS Swaps
Wiring is a cornerstone of a successful LS swap, ensuring proper communication between the engine, ECU, and vehicle systems․ Incorrect wiring can lead to failed starts, poor performance, or even engine damage․ The LS engine relies on its ECU for fuel injection, ignition timing, and sensor inputs, making accurate wiring connections crucial․ Additionally, modern systems like traction control and stability require seamless integration․ Proper grounding, power distribution, and signal routing are essential to avoid electrical noise and system malfunctions․ A well-planned wiring harness ensures reliability, performance, and safety, making it the backbone of your LS swap project․
Planning Your LS Swap Wiring Harness
Planning an LS swap wiring harness involves assessing your vehicle’s electrical needs, choosing between OEM or aftermarket options, and modifying components for compatibility․ Proper routing, connections, and protection ensure reliability and performance, while addressing power distribution and sensor integration is vital․ This step ensures your wiring system is tailored to your specific swap, providing a solid foundation for a successful installation․
Choosing Between OEM and Aftermarket Harnesses
When planning your LS swap, deciding between an OEM or aftermarket wiring harness is crucial․ OEM harnesses offer plug-and-play simplicity and reliability, designed specifically for your engine․ However, they may require modifications to fit your chassis․ Aftermarket harnesses provide customization options, often tailored to your swap’s needs, and may include features like simplified circuits or additional sensor support․ Consider factors like cost, ease of installation, and compatibility with your vehicle’s systems․ For example, a truck harness might need modifications, while a Corvette harness could offer a better fit․ Aftermarket options like the Holley Terminator provide modern, user-friendly solutions․ Choose based on your project’s specific requirements for optimal performance․
Modifying the Original Engine Harness
Modifying the original engine harness is a cost-effective approach for LS swaps, allowing you to retain factory reliability while tailoring the wiring to your project․ This involves simplifying the harness by removing unnecessary components and ensuring compatibility with your vehicle’s systems․ Many enthusiasts choose this method to maintain OEM reliability and reduce costs․ However, it requires mechanical and electrical skills to identify and retain essential circuits․ Proper testing and validation are crucial before installation to ensure all systems function correctly․ This approach is ideal for those seeking a balance between customization and reliability in their LS swap project․
Key Considerations for Wiring Harness Modification
When modifying an original engine harness for an LS swap, careful planning and attention to detail are essential․ Ensure compatibility with your vehicle’s systems and the LS engine’s ECU․ Identify and retain necessary circuits while removing redundant components․ Proper grounding and power distribution are critical to avoid electrical issues․ Consult factory wiring diagrams or pinout charts to ensure correct connections․ Consider vehicle-specific features like cruise control or traction control if needed․ Testing the harness before installation is vital to confirm functionality․ While modifying a harness can save costs, it requires significant mechanical and electrical expertise to execute reliably․

Engine Control System (ECS) Wiring

The Engine Control System (ECS) wiring connects the ECU to essential sensors and actuators, ensuring precise engine operation․ Proper wiring ensures reliable communication for fuel injection, ignition timing, and emissions control․
Understanding the Engine Control Unit (ECU)
The Engine Control Unit (ECU) is the brain of the LS engine, managing fuel injection, ignition timing, and emissions․ It processes data from sensors like the MAF, oxygen sensors, and crankshaft/camshaft positions to optimize engine performance․ For an LS swap, choosing the right ECU is critical—it must be compatible with the engine and vehicle․ Options include OEM ECUs, which are plug-and-play, or aftermarket units like the LS1/LS6 ECU or Holley/EFI systems, offering more adjustability for custom setups․ Proper ECU selection and programming ensure smooth operation, making it vital to match the ECU with your specific LS engine and application․
ECU Wiring Harness Requirements
The ECU wiring harness is a critical component in an LS swap, connecting the ECU to sensors, actuators, and other vehicle systems․ It must include dedicated power and ground circuits, sensor inputs (e․g․, MAF, oxygen sensors), and output circuits for fuel injectors and ignition coils․ OEM harnesses are designed for specific engines, while aftermarket options offer flexibility․ Proper connector compatibility and wire gauge sizing are essential to ensure reliable operation․ Routing the harness away from heat sources and high-voltage components is also crucial for longevity․ A well-designed harness ensures seamless communication between the ECU and the engine, preventing electrical interference and faults․
Grounding and Power Distribution for the ECU
Proper grounding and power distribution are vital for the ECU’s functionality․ A dedicated ground wire should be connected directly to the battery or chassis to ensure a clean signal․ The ECU requires a stable power supply, typically sourced from the ignition switch circuit․ Use the correct wire gauge to prevent voltage drop․ Avoid sharing circuits with high-current accessories․ A fused power supply is recommended to protect the ECU from electrical spikes․ Grounding issues can lead to sensor inaccuracies and engine performance problems․ Ensure all connections are clean and secure to maintain reliable communication between the ECU and engine components․
Mass Airflow (MAF) Sensor Wiring
The MAF sensor wiring is critical for accurate engine performance․ The MAF sensor measures airflow entering the engine, helping the ECU calculate fuel injection․ Typically, the MAF sensor has three wires: power, ground, and signal․ Connect the power wire to the ignition-switched circuit and the ground wire to a clean chassis ground․ The signal wire connects to the ECU․ Ensure proper wire routing to avoid interference․ Use an OEM or high-quality aftermarket connector to prevent signal degradation․ Mount the MAF sensor securely in the intake duct between the air filter and throttle body for accurate readings․ Avoid wiring near high-heat or high-vibration areas․ Clean or replace the MAF sensor if contaminated to maintain accuracy․ Proper wiring ensures reliable engine operation and optimal performance․

Chassis and Engine Wiring Integration
Integrate engine and chassis wiring systems seamlessly by connecting PCM to chassis, ensuring proper communication․ Use OEM connectors for reliability and compatible wiring for optimal performance․
Connecting the PCM to the Chassis
Connecting the Powertrain Control Module (PCM) to the chassis is a critical step in LS swap wiring․ This ensures proper communication between the engine and chassis systems․ Use OEM connectors for reliability and compatibility․ Identify the correct wiring harness pins for ignition, fuel pump, and gauge signals․ Consult the factory wiring diagram to match circuits accurately․ Ensure all connections are secure and properly insulated to prevent electrical interference․ Test the connections before starting the engine to verify functionality․ Proper grounding of the PCM to the chassis is essential for stable operation and accurate sensor readings․
Wiring the Ignition Switch
Wiring the ignition switch is essential for controlling the engine’s electrical systems․ Connect the switch to the battery using a fused circuit to prevent damage from short circuits․ Use high-quality wiring and connectors to ensure reliability․ The ignition switch powers the PCM, fuel pump, and ignition coil․ Consult the wiring diagram to identify the correct terminals for the switch․ Properly ground the switch to the chassis for stable operation․ Fuses or relays should be installed close to the battery for added protection․ Ensure all connections are secure and insulated to prevent electrical interference or fire hazards during operation․
Integrating the Fuel Pump Wiring
Integrating the fuel pump wiring is crucial for proper fuel delivery in your LS swap․ The fuel pump relay is typically controlled by the PCM, requiring a fused circuit from the battery․ Wire the fuel pump directly to the relay, ensuring proper grounding for reliable operation․ Use high-quality wiring and connectors to maintain consistent fuel pressure․ A fuel pressure gauge can be added for monitoring․ Always consult the wiring diagram to avoid conflicts with other systems․ Proper installation ensures consistent engine performance and prevents fuel system failures․ Secure all connections and test the circuit before starting the engine to ensure functionality and safety․
Connecting Dashboard Gauges
Connecting dashboard gauges requires precise wiring to ensure accurate readings․ Begin by identifying the necessary sensors, such as speedometer, tachometer, oil pressure, and temperature gauges․ Use the wiring diagram to connect each sensor to the appropriate gauge․ Ensure all connections are secure and free from interference․ For electronic gauges, connect the signal wires to the PCM or dedicated sensor outputs․ Test each gauge individually to confirm proper function․ Properly grounded wiring is essential for accurate readings․ Use high-quality connectors to prevent corrosion and signal loss․ Always follow the manufacturer’s specifications for gauge wiring to maintain reliability and functionality․

Power Distribution and Accessories
Power distribution and accessories are crucial for reliable operation․ Install a high-quality power distribution center to manage electrical loads efficiently․ Proper wiring for the battery, alternator, and accessories ensures consistent power delivery while minimizing the risk of electrical failures․ Always use appropriate fuses and relays to protect circuits and components․ This setup supports lights, fans, and other essential systems, ensuring smooth operation and preventing electrical issues․
Setting Up a Power Distribution Center
A power distribution center (PDC) is essential for organizing and managing your LS swap’s electrical system․ It acts as the central hub for power distribution, eliminating the risk of electrical overloads and component damage․ Begin by selecting a high-quality PDC designed for your vehicle’s specific needs․ Install it in a dry, cool location, preferably near the battery․ Use heavy-gauge wiring for the main power feed to ensure reliability․ Add fuses and relays for accessories like lights, fans, and pumps․ Properly ground the PDC to prevent noise and interference․ Finally, test the system before starting the engine to ensure smooth operation․
Wiring the Battery and Alternator
Wiring the battery and alternator is a critical step in your LS swap․ Start by selecting a high-capacity battery suitable for your vehicle’s electrical demands․ Connect the positive battery cable to the starter motor and alternator, ensuring proper gauge wiring for minimal voltage drop․ The negative terminal should be grounded to the chassis or engine block․ Install a heavy-duty alternator capable of handling increased power loads․ Use OEM specifications as a guide for wiring thickness and connections․ Secure all terminals with heat-resistant sleeves and ensure proper routing to avoid interference or damage․ Test the charging system before first start․
Accessories Wiring (Lights, Fans, etc․)
Wiring accessories like lights and fans in an LS swap requires careful planning and execution․ Start by identifying all necessary accessories and consulting wiring diagrams for both your car and the LS engine․ Consider using an aftermarket wiring harness adapter to simplify integration․ Ensure the battery and alternator can handle the added electrical load, possibly upgrading if necessary․ Proper grounding is crucial to prevent electrical issues, so check and clean ground wires․ Install a dedicated fuse box for new accessories to avoid overloading the car’s electrical system․ Route wires away from heat sources and moving parts, using protective sleeves․ Label wires for clarity and test each accessory individually with a multimeter to ensure functionality․ Use appropriate tools like wire strippers and crimpers, and always disconnect the battery before starting work for safety․

Sensors and Components Wiring
Properly wiring sensors ensures the LS engine runs smoothly․ Connect crankshaft and camshaft sensors accurately for precise timing․ Oxygen sensors must be correctly integrated for emissions and efficiency․ Temperature sensors require secure connections to monitor engine performance․ Always follow manufacturer specifications and test wiring before starting the engine to avoid errors․
Crankshaft and Camshaft Sensor Wiring
Accurate wiring of crankshaft and camshaft sensors is critical for proper engine timing․ The crankshaft position sensor monitors rotation, ensuring correct ignition and fuel injection․ The camshaft sensor synchronizes with the crankshaft to maintain precise valve timing․ Use high-quality wiring connectors and follow factory specifications․ Grounding these sensors properly is essential to prevent interference․ Consult the factory wiring diagram for correct signal and power connections․ Test sensor wiring continuity before starting the engine to ensure reliability․ Proper installation avoids misfires, rough idling, or engine failure․ Always verify sensor calibration post-installation for optimal performance․
Oxygen Sensor Wiring
Oxygen sensor wiring is vital for maintaining optimal engine performance and emissions control․ The oxygen sensor monitors exhaust gases, providing critical data to the ECU for fuel mixture adjustments․ Proper wiring ensures accurate sensor readings, preventing issues like poor fuel efficiency or increased emissions․ Typically, LS engines use upstream and downstream sensors, each requiring precise connections to the ECU․ Use shielded wires for the sensor signal to minimize interference․ Ensure the sensor is grounded correctly and protected from heat sources․ Always test oxygen sensor wiring for continuity and proper voltage before initial engine start to guarantee reliable performance and emissions compliance․
Cooling Fan and Temperature Sensor Wiring
Cooling fan and temperature sensor wiring is essential for maintaining engine thermal stability․ The cooling fan is typically controlled by the PCM through a relay, requiring proper wiring connections to function correctly․ Temperature sensors, such as the engine coolant temperature (ECT) sensor, provide vital data to the ECU for accurate fuel injection and cooling system operation․ Use high-quality wires and relays to ensure reliable operation․ Proper grounding and fusing are critical to prevent electrical faults․ Always test the wiring before initial startup to ensure the cooling fan and sensors function as intended, preventing overheating and maintaining optimal engine performance․

Safety and Reliability
Proper insulation of wires prevents electrical shorts and fires․ Using high-quality materials ensures long-term reliability․ Secure routing avoids heat and mechanical damage․ Proper grounding enhances electrical stability․ Regular inspections help identify potential issues early․
Fuse and Relay Installation
Fuse and relay installation is critical for protecting your LS swap’s electrical system․ Properly rated fuses prevent overcurrent conditions, while relays handle high-power accessories like fans and pumps․ Mount the fuse box in an accessible, dry location, away from heat sources․ Use high-quality, OEM-style fuses and relays to ensure reliability․ Label each fuse and relay for easy troubleshooting․ Ground the fuse box directly to the chassis or battery for proper operation․ Avoid overcrowding the box, as this can lead to heat buildup and potential failures․ Always follow the manufacturer’s guidelines for fuse ratings and relay wiring to maintain system integrity and safety․
Firewall and Heat Protection
Firewall and heat protection are essential for safeguarding your LS swap’s wiring and components․ High-temperature areas, like near the exhaust or engine, can damage wiring and electronics․ Use heat-resistant materials, such as heat shields or sleeves, to protect critical wiring harness sections․ Ensure the firewall is sealed properly to prevent heat migration into the cabin․ Consider aftermarket heat protection products designed for LS swaps․ Proper insulation and routing of wires away from heat sources are critical to preventing damage and ensuring long-term reliability․ Always prioritize heat protection to avoid costly repairs and potential safety hazards․
Testing the Wiring Before First Start
Before starting your engine after an LS swap, thorough wiring tests are crucial to ensure reliability and safety․ Begin with a visual inspection, checking all connections for tightness and signs of wear or damage․ Verify that all fuses and relays are correctly installed and functioning․ Use a multimeter to test for continuity and voltage, ensuring proper grounding and power distribution․ Activate the ignition to check dashboard lights and fuel pump operation without starting the engine․ Consult a wiring diagram to confirm all circuits are correctly routed․ Address any issues promptly to prevent electrical failures and ensure a smooth first start․